

Ever since I first heard about Pipelines coming to Power Platform, I added it to my bucket list of things to try out, learn, and share. Expectations were quite high, and i’m sure I was not the only one who was super hyped about this new feature 😉
Let’s first check how the setup and configuration is done, and see how this as a overall compares into Azure DevOps Pipelines.
Enabling Managed Environments
It’s all about governance even with the environments! To get started, you need to enable your managed environments. You need to do this for all development and target environments which are going to be used in the Pipeline setup. Enabling them is really straight forward, just go to Power Platform Admin Center, select the environment you want to enable as managed environment, and validate the settings as in the below screenshot.
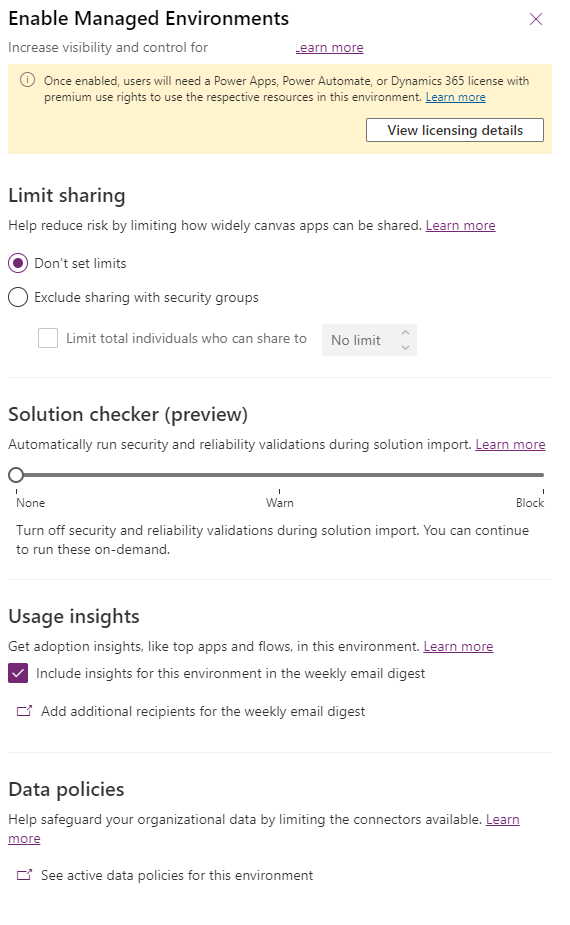
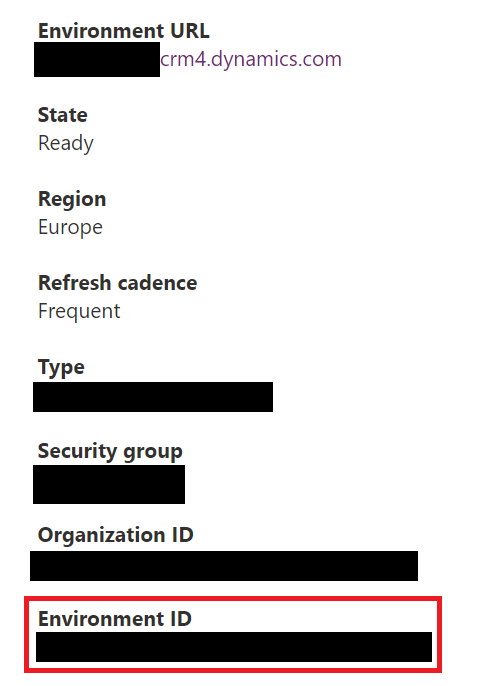
While enabling Managed Environments, you should also copy the environment ID’s of your managed environments, and save them to Notepad++ (or OneNote 😉 ) for later use. You will need this information for the Pipeline configuration. You can find the Environment ID in the Details section of the selected environment.
Configuring host environment
With Power Platform Pipelines comes the concept of host environment. Host environment is a special purpose environment purely used for storing and managing all the pipeline configuration, security and run history. You should not be doing customization work in this environment, as it is recommended to keep it separated and dedicated just for this purpose.
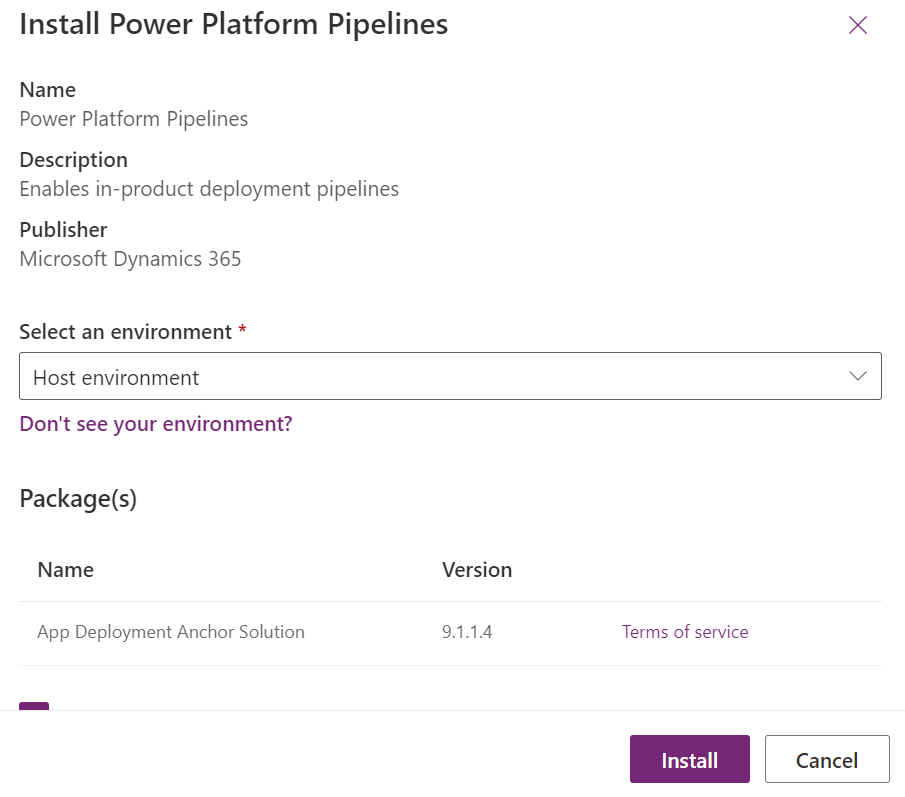
Once you have decided on your environment strategy (number of environments, dedicated host etc.), you can start configuration of host environment by installing Power Platform Pipelines application to your host environment.

Select the environment where you want to install the pipelines. Note that you only need to install this application to your host environment, not all of the environments in your future pipeline setup. If you have multiple host environments, remember to install Power Platform Pipelines application to all of them.
… Installing takes a while, so go grab a cup of coffee while it’s running 🙂
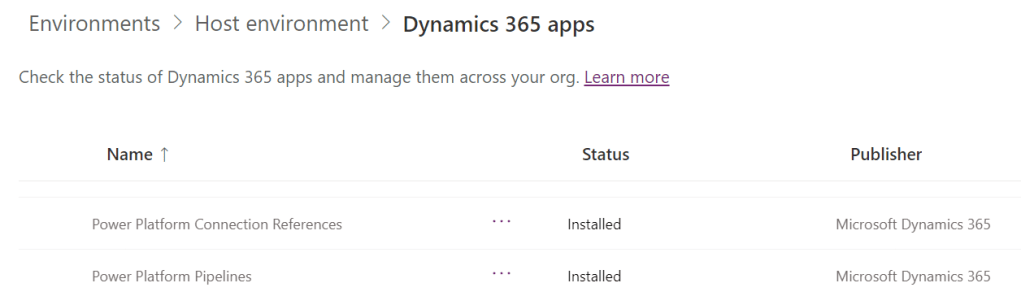
After that cup of coffee, you should be able to confirm the application was installed correcly.
Perfect! Now we can start the actual configuration of the pipelines itself. Time to move over to Power Apps Maker Portal , and select the host environment where you installed the Power Platform Pipelines application. In the Apps -section you should see an app called “Deployment Pipeline Configuration”. Click on it to open the model-driven app for the configuration.

Power Platform Pipeline configuration
Power Platform Pipeline configuration consists of configuring Deployment Environments and Deployment Pipelines.
Remember those Environment ID’s we wrote down earlier? Time to put those in use by adding Deployment Environment -records to the configuration. Use correct environment types! This means for your source environment (where you develop your solution = source), use Type: Development environment), and your other environments as Type: Target environment.
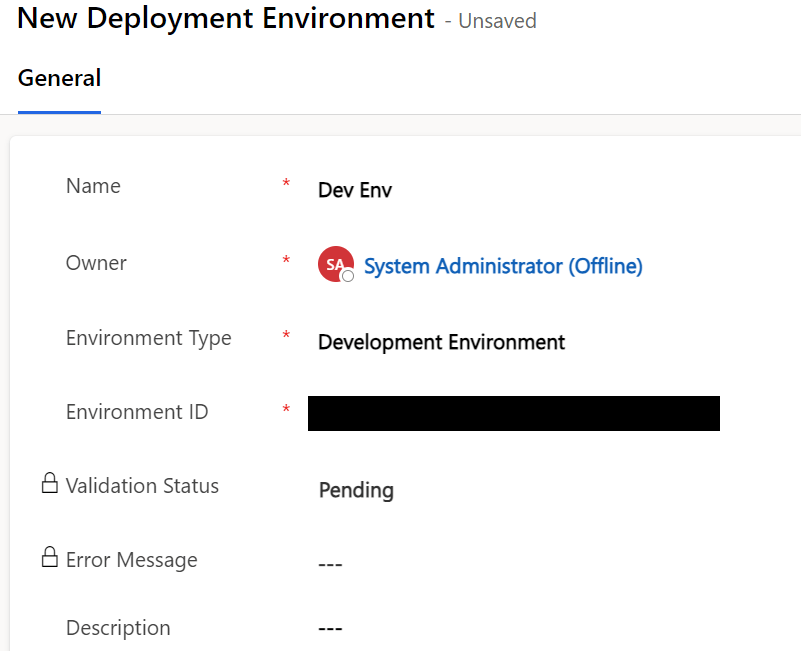
Once you have added all of your environments, validate that each environment has Validation Status as “Success”. If all went smoothly, proceed to creating the Deployment Pipeline -record.
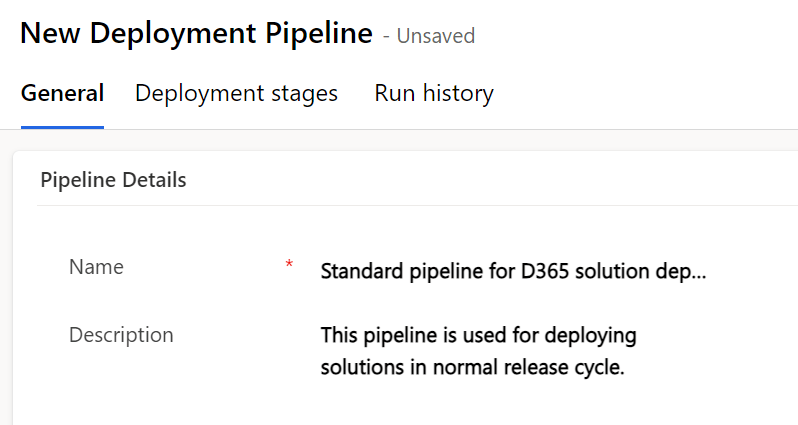
Next you need to Link Development Environment(s) to your Deployment Pipeline. Since we already created the Deployment Environment, we can just add existing Deployment Environment record as a Linked Development Environment.

After linking is done, we need to add Deployment Stages for the Deployment Pipeline. Go to Deployment Stages -grid inside the Deployment Pipeline record, and create necessary Deployment Stage records depending on the amount target environments you have for your pipeline.
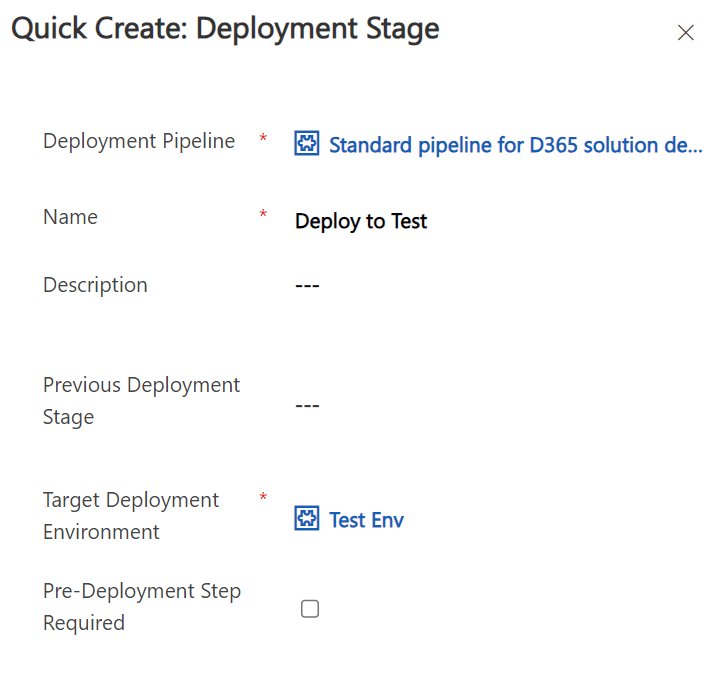
Notice the “Pre-Deployment Step required”? This option should be selected, if you have gates in your CI/CD processes, for example you need to have an approval from someone before the deployment can happen.
At the time or writing this, there is no citizen developer possibility to utilize this, but it is good to know there is already some capabilities in Power Platform Pipelines which support this kind of process. I also think that a user friendly way for managing approvals is probably coming as a feature later down the road.
Anyway, with the configuration of the deployment changes, all that is left to do is to grant access for the users, and share the pipeline records which was just created! For the user access, there is a predefined security role called Deployment Pipeline User, which you can assign to the makers or a team
Only two things is needed: Sharing the necessary records, and assign them security role: Deployment Pipeline User.
Also important to notice, that the user who will deploy with the pipelines require also privilege to import solutions to the target environments.
Running the show
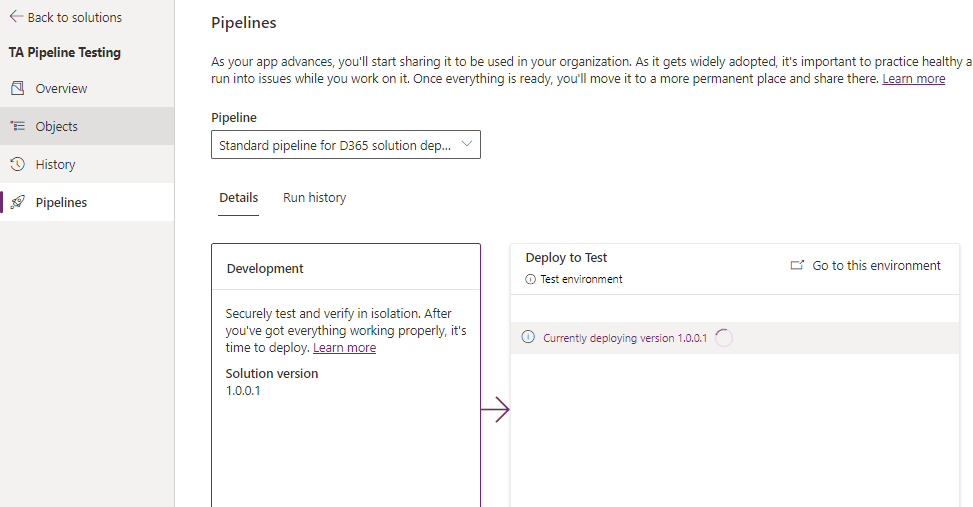
Time to testdrive the pipelines!
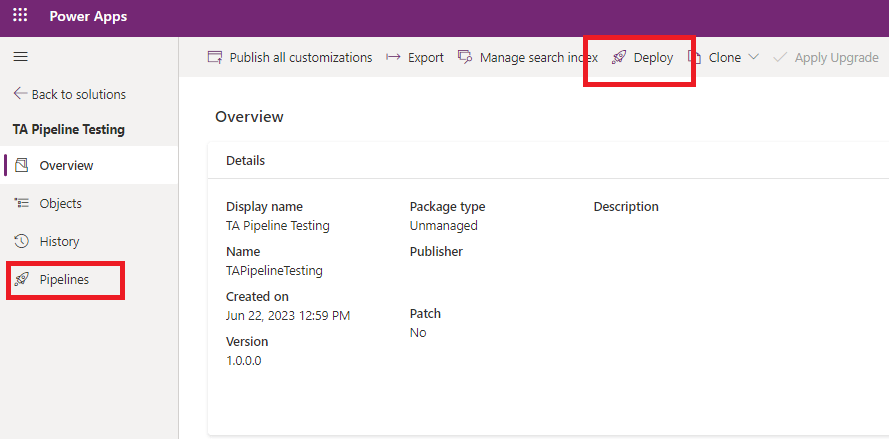
Even though the configurations and the Power Platform Pipelines application is done in host environment, the actual deployment is initiated from the source environment.
To initiate the deployment process, you must first browse to the solution you want to deploy. From the solution you have two options on how to start the deployment: either by clicking Deploy -button in the command bar, or by clicking Pipelines in the navigation pane, and from that view clicking Deploy here -button. Both buttons lead you to an overlaying window on the right side of the screen, where you have very simple deployment options to choose from.
You only have to choose the Deployment Pipeline you want to use, and the desired Deployment Stage. In this example I only have one pipeline and one deployment stage, and I want to deploy the solution immeditially. After validating the parameters are ok, click on Next -button. Pipelines will then run a dependency check for your solution, and if there are no missing dependencies, you will be taken into Summary -section where you can click the Deploy -button and watch the magic happen.


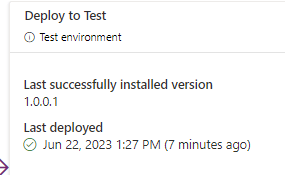
Once you started the deployment, you will be directed back to the Overview of the solution, where you only get small toolbar notification of your solution being deployed. If you want, you can also select the Pipelines from the navigation pane to see the Details -view, and also access Run History to see what has previously been done with the solution deployments, and by who.
After running for a moment, you should see confirmation of a (hopefully) successful deployment. Congratulations, you have officially now taken the step into the world of ALM 🙂
What about Connection References?
Ah, the connection references… my nemesis, and the achilles knee of Azure DevOps pipelines for a long time. Check out my article Connection References in Azure DevOps, and why it matters for more details on how to handle these in Azure DevOps.
When I saw the first sneak peek video of Power Platform Pipelines, they pretty much stated that everything will be possible to be deployed with it, and without any extra hazzle! Quite a promise 🙂 Let’s see how it really is.
So I wanted to just quickly experiment how does it handle the connection references with a service principal connection, by adding a simple Cloud Flow to the solution with a Dataverse action. Connection Reference was new, and not deployed previously.
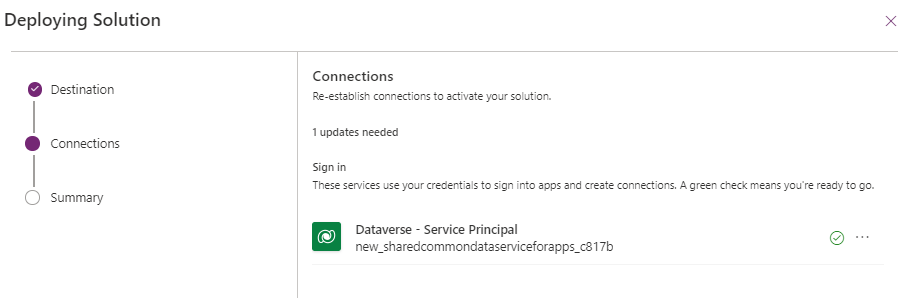
Looks familiar? User experience has been made very similar to what it is when deploying Cloud Flow solutions manually, which is most likely good news for all the Makers out there. If you are deploying first time into your target environment, you need to create new connection for your connection reference in the target environment. Remember that this is required because Connections are not solution aware, and there is no existing connection to use unless you have created a connection for some other flow earlier.
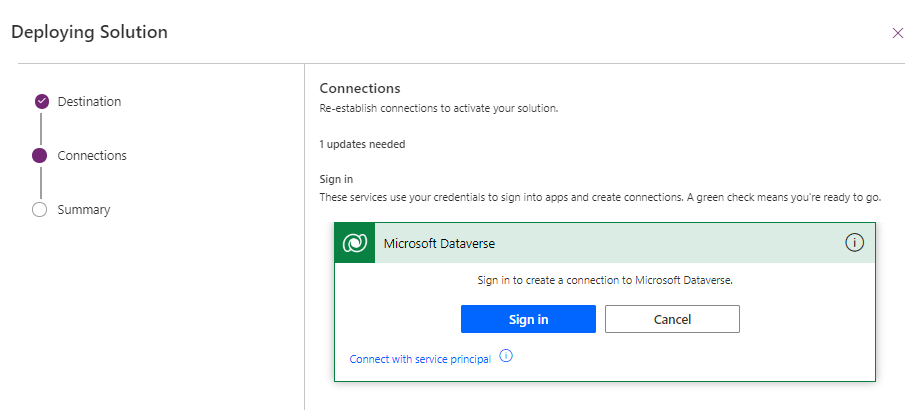
Pipelines will only prompt you if there is a new (or changed) connection reference in the solution. If it finds a suitable connection, it will show you a green checkmark so you can easily just click Next -button, but I would recommend to always double check the connections in when the deployment window prompts you to do so. This is to avoid accidentally associating the Cloud Flow with a connection reference which uses a connection that is not executed as service principal.
Result of the connection references deployment test
Interesting result! I must say that I was initially a bit sceptical about the end result… but it does indeed seem to be so that Power Platform Pipelines are able to associate the connection references into Cloud Flows correctly. Flows stay on, connection references are associated with the correct connection, and I am happy with the end result 😉 And it was really, really easy to do this. No need for the deployment settings population, checking ID’s, adding them to the JSON content etc.
Thoughts on Power Platform Pipelines vs Azure DevOps Pipelines
In the current state of Power Platform Pipelines, it already feels like a huge leap in the right direction. The initial setup and configuration has been made easy enough for pretty much anyone who has a bit of an understanding about environments and ALM.
Solution strategy is still very vital for any Power Platform ecosystem, and as the Pipelines has taken one step closer to the makers and citizen developers, it might be easily forgotten or neglected while users are eager to just add components they are working on into A solution rather than THE solution(s) defined in your solution strategy. I cannot emphasize enough the importance of governance in this area as well.
When I consider the setup that is done to Azure DevOps Pipelines for even getting the basic deployments rolling, it takes considerable amount of more time when compared to Power Platform Pipelines. Sure, you could use templates to import your pipelines and task groups to speed up the process, but it still requires manual actions, and it can get quite technical. I have seen people struggle with the templates as well, if they have no prior experience with Azure DevOps… so it only gets you so far.
On the other hand, Power Platform Pipelines has been developed in a way, that it is quite fast to setup (assuming there is no problems), and using it is super easy. Plus configuration only needs to be done ONCE if your environments stay the same. In Azure DevOps it was considered to be mandatory to always create new build pipeline, and release pipeline for new solutions. Not a huge issue, but in a world of efficiency and automation, with AI knocking on our doors, it becomes a bit tedious.
How to decide between Power Platform Pipelines and Azure DevOps Pipelines? To me, it is starting to become quite clear:
Always start with Power Platform Pipelines. Period. No questions asked. I don’t really see any point in starting with Azure DevOps Pipelines unless:
- You have corporate level requirements for governance
- You need strict version control and deployment requirements span beyond scheduling
- You also use other Azure DevOps services like Boards and Test Plans, so there is clear synergy of having also Pipelines in the same platform
- You need to keep CI/CD processes inside Azure
I hope Power Platform Pipelines will bring everybody one step closer to ALM, and we can all enjoy more structured and automated ecosystem in the future 🙂
If you enjoyed the article, feel free to drop me a message!
